
Blog
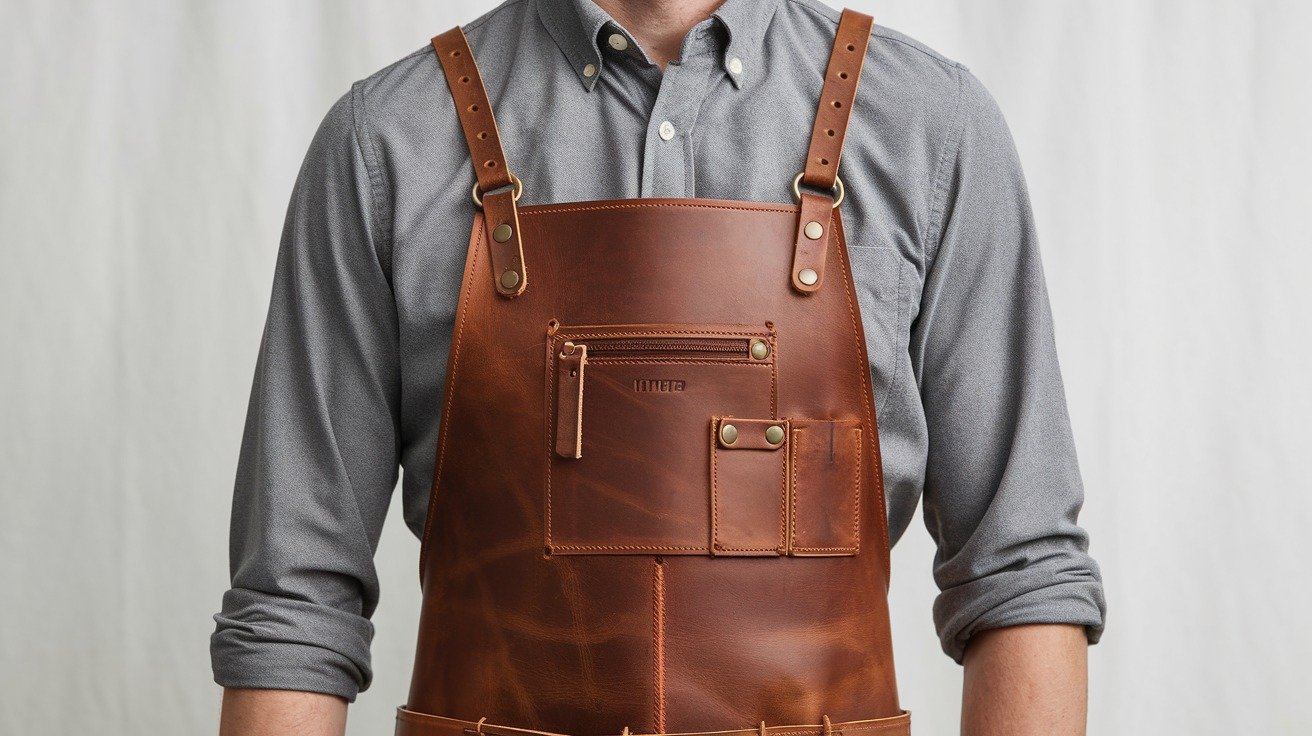
How to Make a Leather Blacksmith Apron?

Have you thought of becoming a blacksmith? If so, you will want to invest in a heavy-duty leather working apron. Made out of heavy leather, the device keeps you from sparks, hot metal and adds uniqueness to the art of blacksmith. In this article, we will explain in detailed the steps and procedures of leather blacksmith apron making, this way you will be able to make a practical and good-looking garment.
The Benefits of Using a Leather Blacksmith Apron:
Before we get into the details of apron making, let’s talk about why one should consider investing in a leather apron for blacksmith forging. Leather is able to withstand heat and endure hard blows from falling objects. Besides, an appropriate apron will restrict movement so that you can concentrate on your forging without any concerns.
Making the Blacksmith Apron from Leather:
1. Measure and Cut the Leather:
First of all, get the measurements of your body in order to come up with the size of the apron. On average, blacksmiths tend to wear aprons from around the chest to the center of the knee bones.
- Measure: You need to measure your chest, waist width and the room you want the apron to hang down.
- Circle the Pattern: Start by using the ruler to score a pattern on the leather. Then cut it out in the form of a belt in the required size. A main body part, two slashes, and a neck strap would suffice.
2. Get the Leather Ready:
You will need to prep the leather before you start any stitching:
- Finishing of the edges: Hectic work is always a part of leather crafting process. Smoothen the edges of the cut pieces – this will facilitate and reduce wear and tear of the pieces over time.
- Marking punctured holes: Indicate edges where you’ll be stitching then punch in corresponding holes for later sewing. Doing so would make sewing a lot easier and cleaner.
3. Join together the Scarf:
Now it is time to stitch pieces together:
- Join Panels: Join position the side panels on the body main section outline. Consider holding them in place using clips or clamps.
- Stitch the side edges: Use a leather sewing needle and coarse thread and make a stitched seam joining the edges of the slashes to the largest section.
4. Design the Straps Around Neck and Waist:
Straps are very important since they help the owner adjust the fittings to their liking. This is how to do them:
- Measure and Mark the position of the Straps: Use spare materials left from the leather to cut to size two long strips of neck and waist straps.
- Buckles can be added: If you wish to have adjustable straps, sort the buckles and fit them onto the ends of the straps so that they can serve their purpose.
5. Final Assembly:

Now that the main pieces have been finished off with the body and the straps, it is now time to add the finishing touches that will be;
- Add the neck strap: Either sew or add a neck strap onto the top of the apron.
- Add the waist strap: Follow the same exercise for the waist strap only let it be adjustable in order to fit the end user.
6. Finishing Touches:
You might feel that your apron is ready for wear and use but bear in mind these steps need done too:
- Conditioning leather: Apply leather conditioner to keep the leather in good shape as it is warm and will always be looking for protection.
- Measurement and fitting: Strap on your apron and adjust the straps in case of any changes in positioning.
Conclusion:
Making a leather blacksmith apron through your hands can be an enjoyable experience for all the artisans out there. Not only do you get protect young yourself when you forge but you let your hands do all the work for you. Any individual will be able to endure creating a nice apron from the right material and good focus and manners, you will end up having an attractive and dainty piece of garment for wearing on special occasions.